bootsonground
How to Set Up QR Safety Inspections at Your Facility
Stop guessing if inspections actually happened. QR-based zone scanning proves physical presence, eliminates pencil whipping, and builds a legally defensible audit trail automatically.
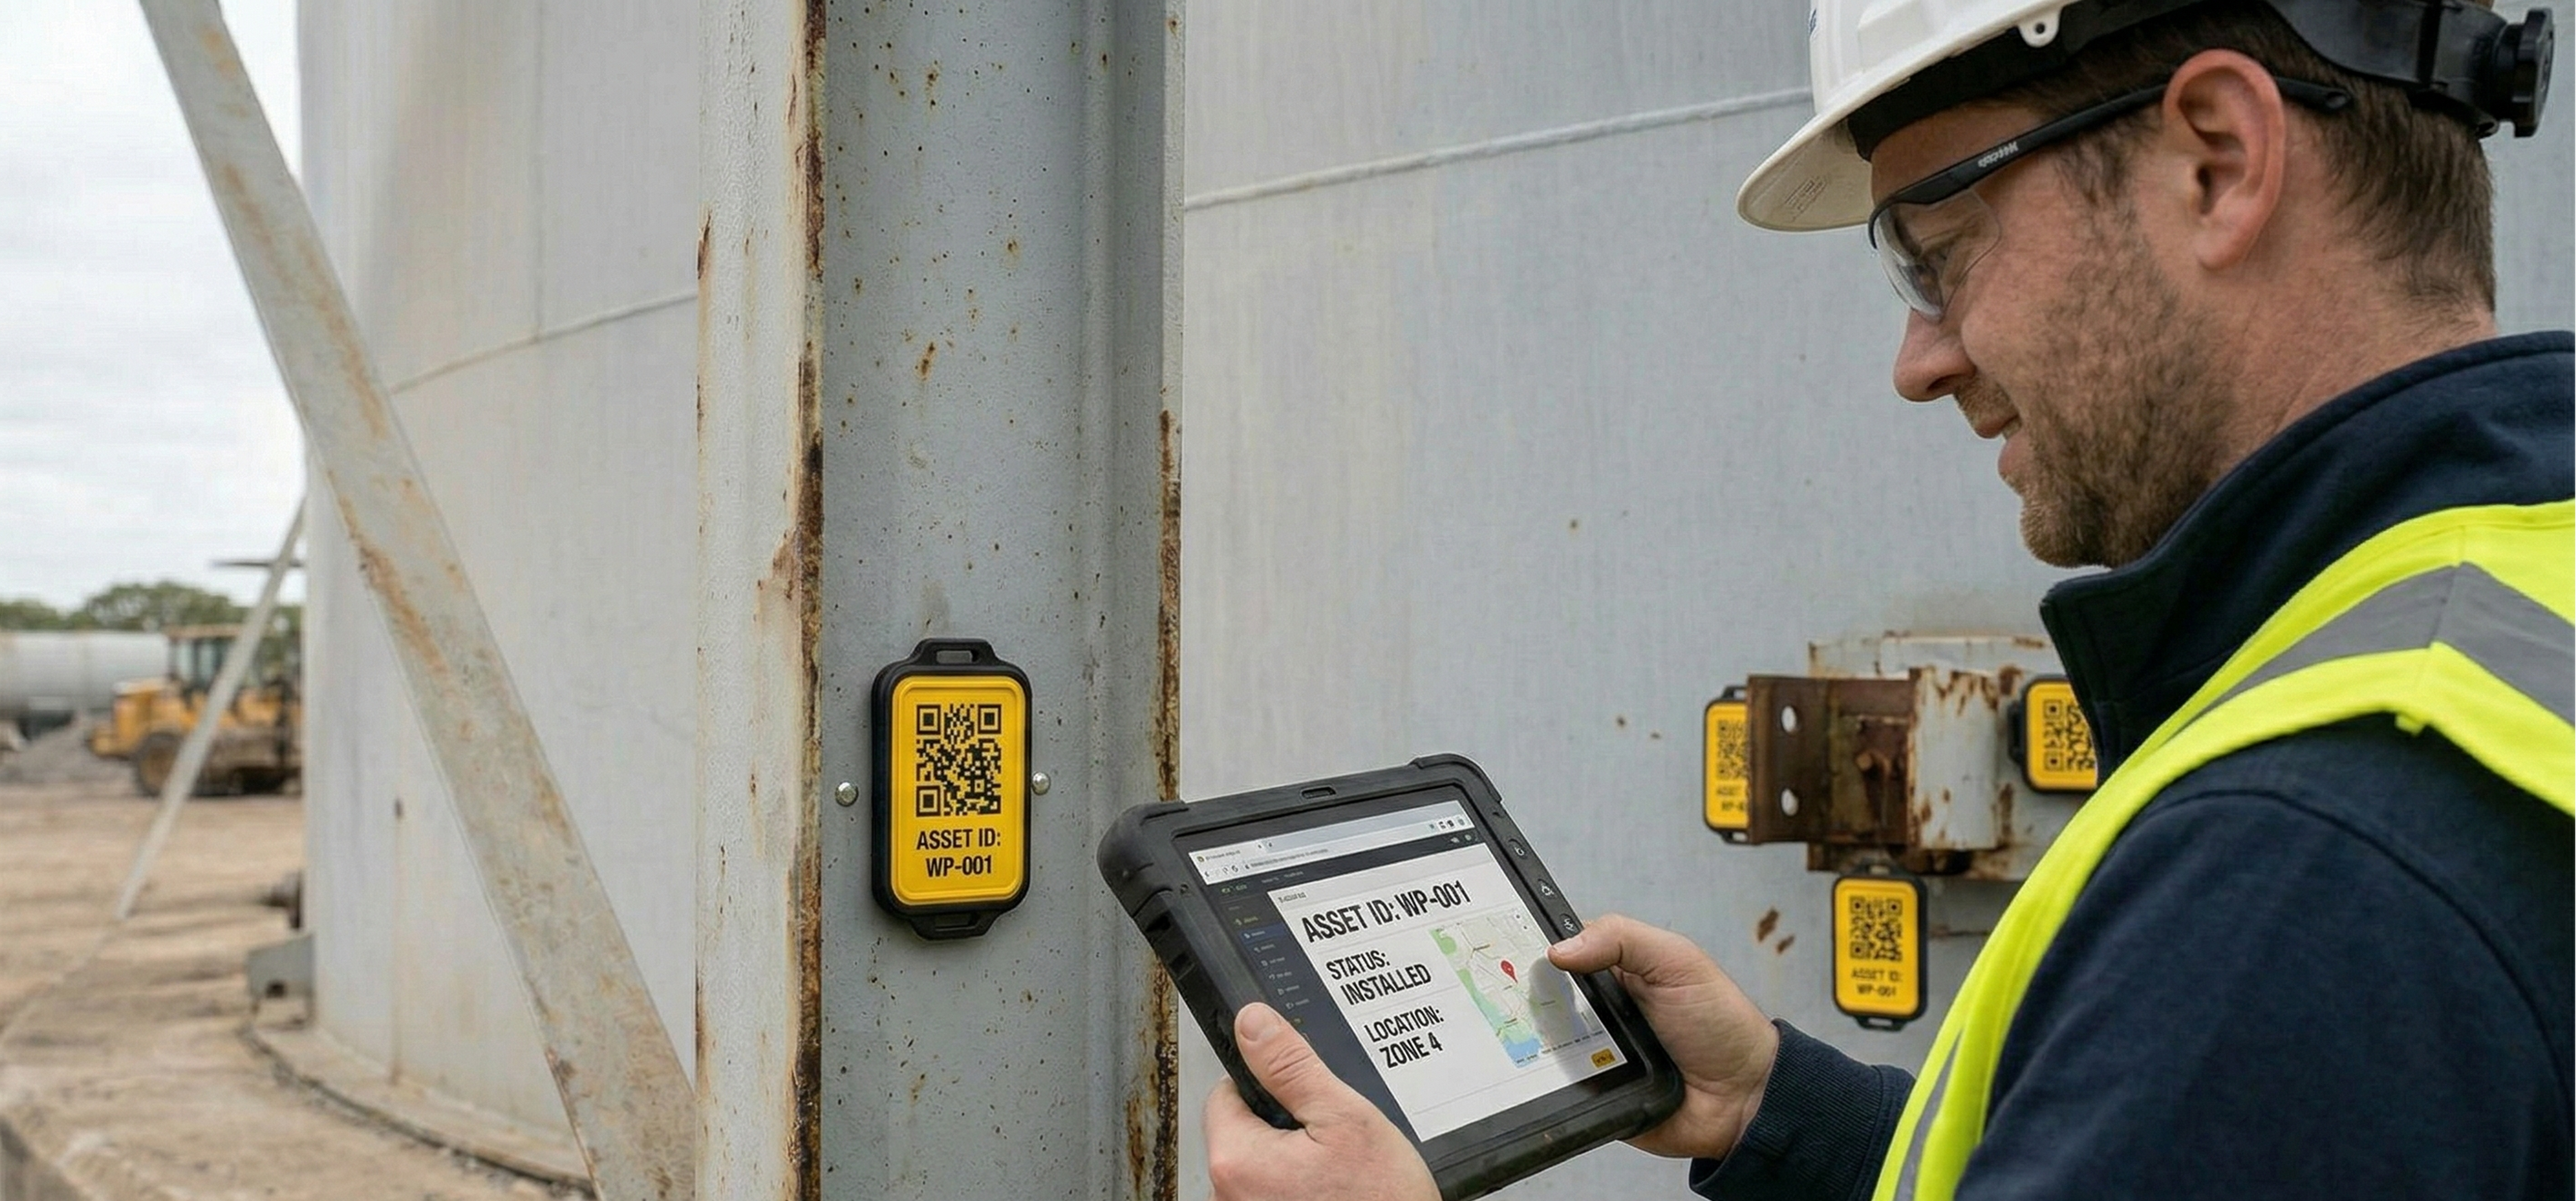
Setting up QR safety inspections means dividing your facility into named Safety Zones, installing a unique QR code at each zone, and linking each code to a location-specific checklist. When a worker scans the code on their workplace inspection app, it proves physical presence at that exact location and opens the correct form automatically. The result is a time-stamped, GPS-verified, photo-documented inspection record that is fully audit-ready and impossible to fake.
Why QR-Based Inspections Replace Paper Checklists
The biggest problem in paper-based safety management is not a lack of checklists. It is pencil whipping, where workers check every box and sign the form without ever leaving their desk or the break room.
Paper-based facility inspection checklists have no mechanism to verify that an inspection actually happened at the physical location it was supposed to. When asked, workers say they completed it. There is no way to prove otherwise.
The consequences are real. One transportation company faced a $340,000 liability after investigators found that drivers had marked 'brakes inspected, OK' on 47 consecutive daily reports without conducting a single real inspection (Source: National Safety Council, 2024). Across their fleet, 67% of drivers were doing the same.
QR-based digital safety inspection software makes this mechanically impossible. A scan proves physical presence. A required photo documents the actual condition. A time-stamp creates an unbreakable record. Digital inspection systems with these controls in place have documented honest completion rates of 89.2%, compared to 3 to 8% with paper systems (Source: National Safety Council, 2024).
Here is how to set one up..
Step 1: Divide Your Facility into Safety Zones
Do not try to tag every asset at once. Start by grouping your facility into logical zones based on risk level.
High-Risk Zones. include chemical storage areas, high-voltage rooms, confined space entry points, and heavy machinery areas. These require daily or per-shift inspections.
Operational Zones include loading docks, assembly lines, packing stations, and warehouse aisles. These typically require daily inspections based on throughput volume.
Facility Zones include HVAC rooms, stairwells, and emergency exit corridors. These carry lower day-to-day risk and require weekly or biweekly inspections at minimum.
For a medium-sized facility, aim for 8 to 25 zones. Under 8 and your groupings are too broad to generate useful data. Over 25 and you risk overwhelming workers during rollout.
Pro tip. In 2026, the most efficient sites use Dynamic Zoning, where a zone's required inspection frequency increases automatically when a near-miss is reported in that area. BootsOnGround, built and operated to ISO 27001, ISO 9001, and ISO 20000 standards, supports this natively without any manual adjustment from a safety manager.

Step 2: Build Zone-Specific Checklists
A generic checklist is a failed checklist. Every QR code should trigger questions written specifically for that location.
For a loading dock: Are dock levelers clear of debris? Are wheel chocks in place? Is the pedestrian exclusion zone unobstructed?
For a chemical storage area: Are all containers correctly labeled and sealed? Is secondary containment intact? Is the eyewash station unobstructed and functional?
If your facility inspection checklist questions could apply to any room in any building, they are not specific enough.
Every checklist must include at least two required photo capture fields. This forces the inspector to document the actual physical condition of the zone at the time of inspection. It also gives your AI layer material to analyze for hazards the inspector may have missed.
Organizations that added required photo fields to their digital safety inspection workflows reported a 213% increase in hazard identification, with 68% of those hazards coming through the inspection system rather than separate reports (Source: Verdantix, 2024).
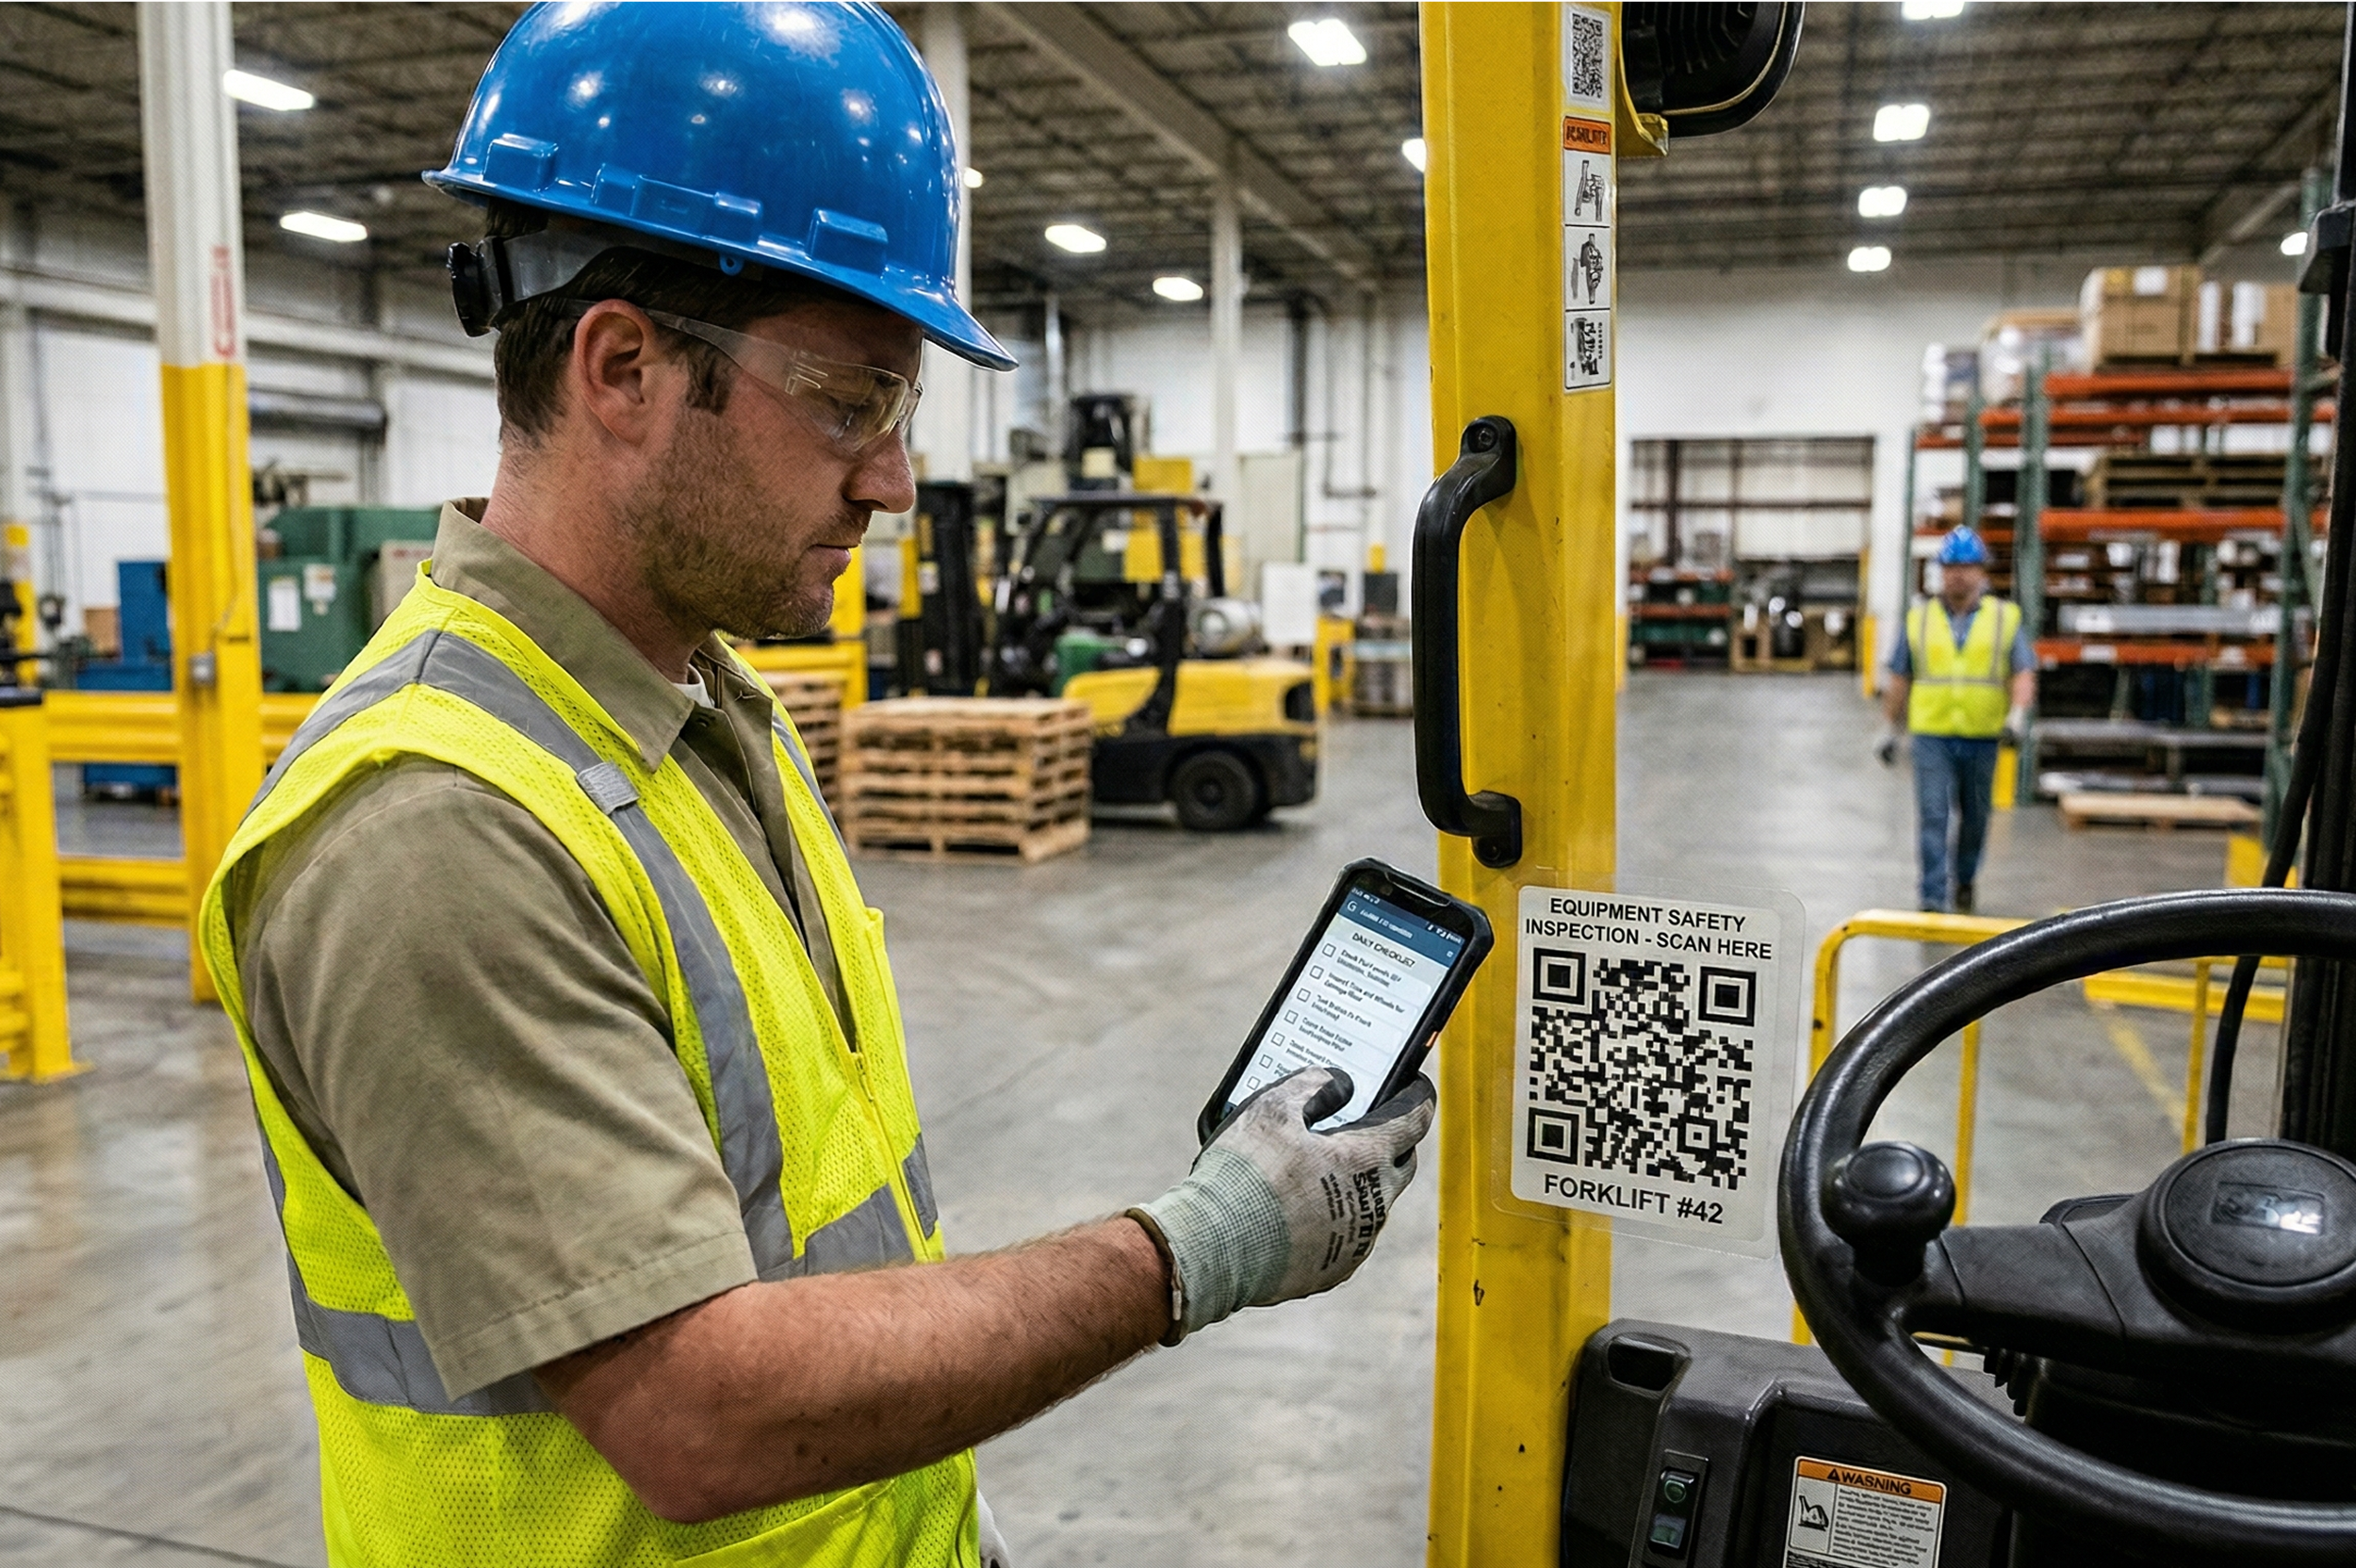
Step 3: Install Weather-Proof QR Tags
Mount each tag at eye level at the primary entry point to the zone. Consistent placement builds muscle memory so workers know exactly where to look when they enter any zone.
For standard indoor environments, durable laminated labels with UV coating work well.
For outdoor, high-heat, or chemically active environments such as oil and gas or mining sites, use industrial-grade tags including UV-resistant vinyl, anodized aluminum plates, or stainless steel engraved codes rated for the specific conditions of your environment.
For outdoor, high-heat, or chemically active environments such as oil and gas or mining sites, use industrial-grade tags including UV-resistant vinyl, anodized aluminum plates, or stainless steel engraved codes rated for the specific conditions of your environment.
Before moving on, scan every installed tag yourself to confirm it opens the correct checklist. This takes two minutes per zone and prevents workers being routed to the wrong form on day one.
Step 4: Configure the Traffic Light Dashboard
Once tags are live, configure your BootsOnGround dashboard using the Traffic Light Protocol. This gives safety managers live status visibility across every zone without opening a single report.
Green means the zone was inspected within its required window with no fail items logged. No action required.
Amber means the inspection window is 80% elapsed without a completed scan. An automated push notification goes to the shift lead. Accountability is triggered before the deadline is missed.
Red means the window has closed without a scan, or a worker submitted a fail on a critical checklist item. An immediate escalation goes to the Safety Director. The zone cannot return to green until the escalation is acknowledged and a corrective action is logged.
This is management by exception. A safety manager overseeing 20 zones checks one dashboard, sees 18 green and 2 amber, and directs their time where it is needed. No manual report reviewing required
Step 5: Train Workers Using the One-Minute Rule
The biggest barrier to adoption is the perception that digital safety inspection software takes longer than paper. Address this directly in your first training session by demonstrating the process out loud and timed.
The biggest barrier to adoption is the perception that digital safety inspection software takes longer than paper. Address this directly in your first training session by demonstrating the process out loud and timed.
When workers see it completed in under a minute, the perception barrier breaks immediately.
Then reinforce the practical benefit. Workers no longer carry clipboards, return to the safety office to file paperwork, or remember which facility inspection checklist applies to which zone. They scan, complete, and submit from exactly where they are standing.
Then reinforce the practical benefit. Workers no longer carry clipboards, return to the safety office to file paperwork, or remember which facility inspection checklist applies to which zone. They scan, complete, and submit from exactly where they are standing.
Frequently Asked Questions
Get Your First Zone Live Today
Setting up your first QR Safety Zone in BootsOnGround takes less than 30 minutes. Map your zone, build your checklist, generate your QR code, install your tag, and conduct your first digital inspection before the end of the day. Once your zones are generating consistent data, that data feeds directly into your AI risk intelligence layer, identifying hazard patterns before they become incidents.